chocolate covered pomegranate

13:36 0 Comments A+ a-

Oh Yeah I Am Excited!


It isn’t often that I get this excited about a recipe!  Ok, I might be fibbing a bit….I am ALWAYS excited to share my recipes with you all, but this recipe is absolutely amazing!  
A few weeks ago I really dove into learning everything there is to know about a pomegranate.  To think that I had never even tried one before because I didn’t know how to open one and retrieve the fruit/seeds.  

Let’s Get To Cooking!


These little candies are so easy to make!  The first thing you need to do is get the seeds out of your pomegranate. You will only need about 2/3 cup of pomegranate seeds for this recipe.  You could use more if you would like and you certainly will have some left over to enjoy later.
After you have removed the seeds, set aside.  Now you are going to need 1 cup of dark chocolate.  I used Enjoy Life Semi-Sweet Chocolate Chips, Gluten, Dairy, nut & Soy Free, Mini Chips for this recipe.

How To Use A Double Boiler


In a double boiler, melt your chocolate.  I have 4 pictures below to show you how to properly set up a double boiler.  Just add enough water to a saucepan to touch the bottom of the bowl that will sit inside the saucepan.  Make sure the bowl is safe for heat and that water won’t get into the bowl that has the chocolate.
Bring the water to a boil and set the bowl on top of the water (turn heat down once you add chocolate) , pour the chocolate in the bowl and stir until it is nicely melted.  This took me about 5 minutes.


Assembling The Chocolates


Do not remove the bowl with the chocolate from the saucepan.  The hot water below the bowl will allow the chocolate to stay warm while you are assembling the candy.  Simply remove the saucepan from the burner once the chocolate is melted and take it to desired location where you are putting together your candy.
In a mini muffin pan, add some mini muffin inserts.  Place some melted chocolate in the bottom of the muffin insert and place the pomegranate seeds on top of the chocolate.

 Continue to do this for all 12 pieces of candy.  It is okay if things get a little messy…trust me, it is worth it!
I didn’t fill mine all the way to the top, because I really wanted to taste the chocolate, but if you are wanting more of a pomegranate burst, fill them up! 

Now simply pour more chocolate over the pomegranates.  If you added more pomegranate to your candy, you might need a little more melted chocolate.  
Can I just tell you…you know when you have a chocolate covered cherry and you bite into it and the juice just pours out of the bite?  Oh the ooey, gooey goodness (I know, ooey isn’t a word, but you can taste the deliciousness!)  Well that is what you get from these fantastic candies!  Watch out, they are juicy and delicious!

Place in the refrigerator until the chocolates firm up.  Mine took about a half hour to set up.  When they set, dive in and enjoy!  
I store mine in the refrigerator for about a week but they won’t last that long.  My guess is that you will be making another batch tomorrow! :)  A perfect treat for the upcoming valentines holiday!

Dark Chocolate Mousse

12:53 0 Comments A+ a-


                 Dark Chocolate Mousse


Soft, creamy, chocolate mousse. Smooth, almost pudding-like, chocolate mousse. Rich, super chocolatey mousse. If you’ve never tried it, it’s unbelievably easy to make at home.
You crack some eggs. You melt some chocolate. You whip some cream. You have a fantastic dessert that’s perfect for date night, Valentine’s Day, or my favorite reason: just because.


I added 1 Tbsp espresso to the mousse – the coffee helps enhance the chocolate but doesn’t make the mousse taste like coffee. I recommend using it – or maybe subbing with your favorite flavored liqueur. (A note: The coffee cups in the photos above are actually quite large – each mug is actually holding ~1 cup of mousse, which is a full recipe. If you want a more generous serving [~1 cup each], you can double the recipe. Proceed with caution – it’s wonderfully rich!)

Ingredients

  • 2 large egg yolks
  • 2 Tbsp sugar
  • pinch of salt
  • 1 Tbsp espresso or strongly brewed coffee (optional)
  • 1 Tbsp unsweetened cocoa (I used Hershey's Special Dark blend)
  • 1 oz bittersweet (or your favorite dark) chocolate, finely chopped
  • 3/8 cup heavy cream, chilled
  • Chocolate shavings, for garnish (optional)

Instructions

  1. Set a glass bowl over a pot of simmering water. Whisk the egg yolks, sugar, salt, and espresso until the mixture is very warm and the sugar has completely dissolved (rub a bit between your fingers to check that there are no granules).
  2. Add the cocoa and chocolate and whisk until almost melted. Remove the bowl from the pot and set aside.
  3. Whisk until completely melted and then let cool to room temperature/slightly warm.
  4. Whip heavy cream until soft peaks form. Add half of the whipped cream to the bowl of chocolate and fold with a rubber spatula until mostly combined.
  5. Add the remaining whipped cream and fold until completely combined.
  6. Divide the mousse among 2 small dessert dishes. Cover with plastic wrap and chill for at least 2 hours (and up to 1 day). (I cut a paper towel in half and covered the top of the dish, not touching the mousse, before wrapping - this will catch any condensation drips that might form on the plastic wrap before they drip on the top of your pretty mousse). Remove from the fridge 15 minutes prior to serving.
  7. Garnish with chocolate shavings or additional whipped cream.

Chocolate Meringue Cake with Berries

12:26 0 Comments A+ a-


Chocolate Meringue Cake with Berries

Serves 8-10

Ingredients
*For the cake:
- 225g dark chocolate, chopped (about 1 1/2 cups)
- 3/4 cup unsalted butter, chopped
- 2 large eggs
- 4 yolks (save the whites! You’ll use them for the meringue)
- 1/3 cup brown sugar
- 1 teaspoon vanilla extract
- 1/3 cup all purpose flour, sifted
- 1/2 teaspoon baking powder, sifted
- 1/3 cup almond meal

*For the meringue:
- 4 eggs whites
- 3/4 cup super fine sugar
- 1 teaspoon white vinegar
- 2 teaspoon cornstarch, sifted
- 1 tablespoon cocoa
- 1/4 cup dark chocolate, melted

Instructions
CAKE
1. Preheat the oven to 325F. Lightly grease a springform 8inch cake pan, place some parchment paper on the bottom and set aside.
2. Place butter and chocolate in a small pot over low heat and warm enough to melt them. Turn off the heat let it stand for a bit.
3. In a large bowl place the eggs, egg yolks, brown sugar, and vanilla and mix or whisk for about 5 minutes until the mixture is pale and has doubled in size (it should look really frothy and thicker). Add the chocolate/butter melted mixture, flour, baking powder, and almond meal and gently fold until combined. Place batter in the cake tin and bake for about 30 min JUST until set – DO NOT COOK FULLY! We need to add the meringue so it should 3/4 done (it’s ok if it’s looks a bit “raw” still). Remove from the oven, set aside.

MERINGUE
As soon as you take the cake out of the oven, start the meringue! Not before, as meringue can’t sit.
1. Increase temperature in the oven to 350F
2. Place egg whites in a CLEAN bowl (no grease, no water) and beat them to soft peaks. Slowly add the sugar (about 1 tablespoon at at time). When you’re done with the sugar, add the vinegar and beat until meringue is nice and glossy. Add the cornstarch and cocoa and gently fold. Finally, slowly drizzle the melted chocolate and place the whole thing on top of the cake. Don’t mix the chocolate as you want natural swirls to happen!
3. Place the cake with the meringue back in the oven and bake for about 20 minutes or until the meringue feels dry. Remove from the oven when done and let is stand outside for a bit.

**NOTE** The meringue will still be chewy and gooey in the middle and that’s ok (as long as it’s not super runny and raw). You won’t get the same consistency as a regular hard meringue (which takes about an hour in the oven) otherwise the cake would dry like crazy.
Now you can either serve it at room temp OR – my fave – you can chill it for an hour or so.
To serve simply top with LOADS AND LOADS of berries and you’re good to go! Have a glass of cold milk (of any kind) nearby. Yumssss


Darkest Chocolate Cake with Red Wine

15:06 0 Comments A+ a-


ingredients

Cake:
  • 1 cup (2 sticks) unsalted butter, cut into pieces, plus more for pan
  • 1/3 cup all-purpose flour, plus more for pan
  • 8 ounces bittersweet chocolate (at least 70% cacao), chopped
  • 1 cup sugar
  • 4 large eggs
  • 3/4 teaspoons kosher salt
Glaze and assembly:
  • 8 ounces bittersweet chocolate (at least 70% cacao), finely chopped
  • 1/4 cup (1/2 stick) unsalted butter, cut into small pieces
  • 1/2 teaspoon kosher salt
  • 1/2 cup powdered sugar
  • 1/2 cup red wine (such as Pinot Noir)
  • Special equipment:A 9" springform pan

preparation

For cake: 
Preheat oven to 325°F. Lightly butter and flour pan. Heat chocolate, sugar, and 1 cup butter in a heatproof bowl set over a saucepan of simmering water (bowl should not touch water), stirring, until chocolate is almost completely melted, about 3 minutes; remove from heat and continue to stir until chocolate is completely melted. Let cool completely.
Using an electric mixer on medium speed, add eggs to chocolate mixture 1 at a time, beating to blend after each addition. Beat until mixture has a mousse-like consistency. Reduce speed to low and add salt and 1/3 cup flour; mix until smooth. Scrape batter into prepared pan; smooth top.
Bake cake until top is firm and edges are slightly darkened, 55–65 minutes (rely on visual cues; a tester inserted into cake's center will come out clean before cake is truly done). Transfer pan to a wire rack and let cake cool completely in pan before turning out.
For glaze and assembly: 
Heat chocolate, butter, and salt in a heatproof bowl set over a saucepan of simmering water (bowl should not touch water), stirring, until chocolate and butter are melted, about 5 minutes. Whisk in powdered sugar.
Meanwhile, bring wine just to a boil in a small saucepan.
Remove chocolate mixture from heat and whisk in wine; let cool until slightly thickened and a rubber spatula leaves a trail in mixture when stirring, 8–10 minutes.
Set cake on a wire rack set over a rimmed baking sheet. Pour glaze over cake and spread it across the top and over the edges with an offset spatula. Let cake stand at room temperature until glaze is set, 2–3 hours.
DO AHEAD: Cake can be made and glazed 2 days ahead. Chill. Bring to room temperature before serving.

Blackout Coco Cake

14:40 0 Comments A+ a-


A proper celebratory cake should consist of at LEAST three layers, am I right? Unless the two layers are really thick, or the one layer is a flourless chocolate cake, or an olive oil cake, or something else rustic (and probably foreign). That being said, this cake features three teeny-tiny layers, so maybe it’s only technically a one-and-a-half layers tall. But that’s neither here nor there. The official story is, I made a three-layer cake, and that’s that.
The occasion? My birthday! (I know, I know, who makes their own birthday cake? Hello, a food blogger, duh!) We celebrated on Saturday, therefore the cake was consumed that day. I had to hustle to complete it because my original idea for a twenty-something-layer crepe cake flopped (also, I discovered that Trader Joes’s powdered sugar is slightly gray-colored. Ever seen a gray glaze on a cake? Probably not, because it’s gross-looking.)
While the cake was consumed in its entirety, I did manage to save a slice so you could see the layers within. For what it’s worth, I found it a bit flat-tasting, lacking in depth, the frosting especially. I was surprised, since it’s from the Hummingbird Bakery cookbook, but then again, I did learn recently that there is such thing as too much chocolate. If you make it, let me know what you think. I may have to adjust my chocolate expectations.


BLACKOUT COCO CAKE
Makes one 3-layer 6-inch cake
Adapted from the Hummingbird Bakery Cookbook
Note: This recipe was created by Hummingbird Bakery, a London bakery. Michelle wrote that she found the chocolate pudding difficult to make, but I used an immersion blender to mix the corn starch with the water and had no problems with the pudding coming together whatsoever. (A lot of Chinese dishes involve slurries, corn starch with water mixes used to thicken sauces, so maybe I’m just used to the weird properties of corn starch.)
Ingredients:
For the frosting:
1-3/4 cups water plus 1/4 cup water, separated
1-3/4 cups granulated sugar
1/2 Tbsp light corn syrup
1/2 cup unsweetened cocoa powder
scant 1/3 cup cornstarch
3 Tbsp unsalted butter, cold and cut into 1-inch cubes
1/4 tsp pure vanilla extract
For the cake:
3-1/2 Tbsp unsalted butter, at room temperature
10 Tbsp granulated sugar
1 egg, room temperature
1/4 tsp vanilla extract
1/6 cup unsweetened cocoa powder
scant 1/2 tsp baking powder
scant 1/2 tsp baking soda
a pinch of salt
1 1/3 cups all-purpose flour
2/3 cup whole milk
Directions:
For the frosting: Ideally start on this the day before to give it time to cool fully. Combine 1-3/4 cups water, sugar, light corn syrup, and cocoa powder into a small sauce pan and bring to a boil over medium heat, whisking occasionally. In the meantime, combine the remaining 1/4 cup water with corn starch in a cup and mix with an immersion blender until dissolved. It’ll be relatively thin and uniformly opaque.
Slowly pour the corn starch mix into the sauce pan, whisking vigorously. Let the mix come back to a boil, whisking still. Continue whisking as the pudding thickens. It shouldn’t take more than a few minutes for it to reach a thick chocolate pudding-like consistency. Turn off the heat and stir in the butter, incorporating it completely. The pudding should be shiny and thick.
Pour the pudding into a receptacle, cover the surface with plastic wrap, and place it in the fridge until completely cool.
For the cake: Preheat the oven to 325 degrees F. Butter a 6-inch round pan, and lay a circular parchment paper round on the bottom.
In a stand mixer bowl, cream the butter and sugar until light and fluffy, about 5 minutes. On low speed, mix in the egg until it’s completely incorporated. Scrape down the sides of the bowl, then, on low speed, beat in the vanilla extract, cocoa powder, baking powder, baking soda, and salt. Continue mixing until just combined, then add about half the flour as well as the milk. When just combined, add the remainder of the flour, mixing until just combined.
Pour the batter into the prepared pan, and place it in the oven. Bake for about 30 minutes, until a skewer inserted in the middle comes out clean and the top bounces back a little when you push it. Let the pan cool for a minutes, then empty the cake onto a cooling rack to completely cool. Remove the parchment paper round.
Assembling: Slice off the domed top of the cake. Save it for the crumb topping. Carefully, slice the cake into three even-sized layers (they’ll be quite thin, so be careful). Proceed the way you’d normally assemble a layer cake, adding about 1/4 of the chocolate pudding frosting between layers. (When you take the pudding out of the fridge, it’ll be kind of hard to work with initially, but will become more malleable once it’s been worked with a spatula for a bit.) Cover the exterior of the cake with the rest of the chocolate pudding.
Finally, take that saved dome and process it in a food processor until it turns into fine crumbs. Using a sieve, spread the crumbs evenly across the top of the cake. With the remaining crumbs, cover the sides. I found this easiest to do by taking a handful and patting them onto the sides, first covering the bottom, then moving onto the top.


Chocolate covered cheesecake pops

14:22 0 Comments A+ a-


 Eat, eat, before it melts!!


They are really easy to make so we can all get our cheesecake fix any day of the week! The lollipop sticks are not at all traditional but I think a cheesecake-lollipop trend is right around the corner. I mean, what doesn’t taste better on a stick?!


Ingredients (makes approx. 20 pops):
  • 12 oz farmer’s cheese
  • 4 oz cream cheese (low fat worked great for me)
  • 1/2 cup sugar
  • 2 egg yolks
  • zest of 2 lemons
  • juice of 1/2 lemon
  • 12 oz chocolate, chopped (I used bittersweet – use your favorite!)
  • 3 tablespoons of solid vegetable shortening
  • equipment: cheesecloth
  • optional: lollipop sticks

Instructions:
In a food processor, combine farmer’s cheese, cream cheese, sugar, egg yolks and lemon juice.
         

Mix in lemon zest.

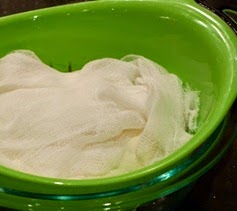
Add cheese mixture to a colander lined with a cheesecloth (folded in 2 layers).

Fold cheesecloth over the cheese mixture, cover with a plate and a few heavy cans.
Place colander over a medium bowl. Refrigerate overnight to allow for the whey to strain.
The next day, take the cheese mixture out of the cheesecloth. It should be slightly hardened. Form into small balls. I like using a medium cookie scoop for this task.
Super easy!
In a double boiler (or medium bowl set over a pot of simmering water), melt chopped chocolate and shortening. Let cool for a few minutes.
If using lollipop sticks, insert sticks into the cheesecake balls and dip in chocolate. Place on a large cookie sheet (or serving tray) and refrigerate until the chocolate is set. If you don’t have lollipop sticks, use a toothpick for dipping, then dollop some chocolate over the toothpick hole.


Enjoy!!! I found them best served straight from the fridge. Too long out of the fridge and the cheese starts to soften (still delicious but it gets a bit messy).


What are your favorite bite-sized desserts? Any recent food experiences stirring up long forgotten moments?